The last time that I made a squash stuffed pasta was in February 2021.
It was Galentine’s Day weekend and our friend group was staying at my friend’s house on the Finger Lakes in upstate NY. It was exactly what you’d expect from a group of ladies in their 20s on February 14th–a weekend full of wine, spa appointments, and of course, an early morning ice fishing excursion.
Oh, I’m sorry–is that not what all female friend groups do on Valentine’s Day??
Well there we were, in the middle of a frozen lake in the great outdoors. The two burly fishermen that led our excursion seemed ~slightly~ thrown off that this was what a group of 8 women chose to do at 7am on Valentine’s Day, but they rolled with it and led us to the two tents they had set up in the middle of the ice.
I must admit, I went into the day a bit skeptical that I would have fun. If you know me, you know that I live my life by these three truths : 1) hand-eye coordination is not my strong suit, 2) tents are a no, 3) long periods of time in freezing temps are also a no (I have Raynaud’s). So theoretically, fishing in tents in the freezing cold for multiple hours was also going to be a no.
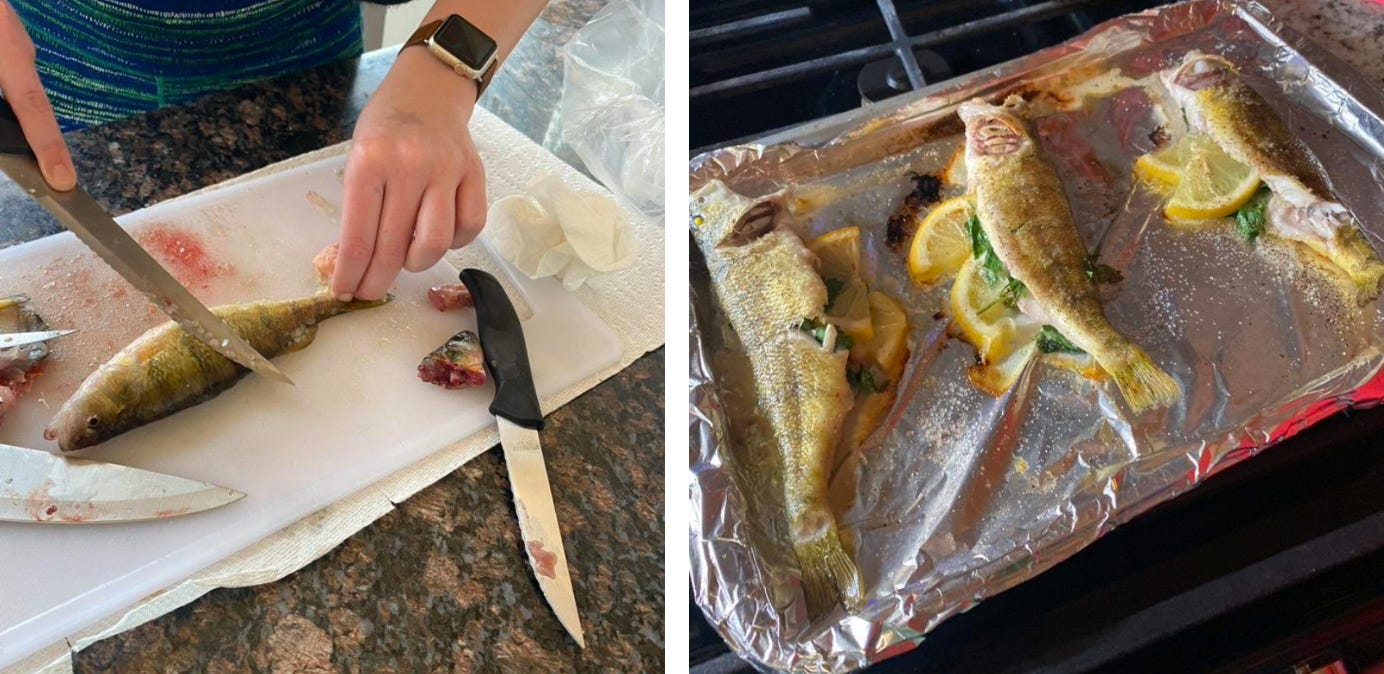
Despite my apprehension, I was happily surprised by the morning and actually had a great time catching tiny fish out of just as tiny holes of ice. The tents had space heaters, the company was world class, and I learned a thing or two about catching fish (ish)!
But, because I can’t just have nice things, disaster struck towards the end of the morning.
There I was: in the tent, watching 3 of my friends fish, and eating peanut-butter filled pretzels (a truly elite snack). It was then that I noticed that two of my friends’ (whose swoon-worthy, budding romance with each other had just begun) fishing hooks had gotten caught together.
So many things happened at once.
I obviously exclaimed, “ooooooooo looks like you two caught each other!” (batting my eyes like the mature adult I am). Their poles came flying out of the ice. The pretzels fell from my lap as I shifted and dramatically lamented, “Not the pretzels! The fish! They’ll die!”.
And then, as I reached to grab the rogue pretzels, my iPhone (a recent Christmas gift that I stupidly had taken out of my pocket) slid from my lap.
It was like one of those slow motion scenes from a Rom-Com. I watched, horror struck, as my phone ice-luged into the ice fishing hole (an opening about as big as a golf ball hole), as though it was preparing for Olympic bobsledding. It sank to the depths of the lake faster than the Titanic.
You can add my iPhone to my list of things I’ll never get over that sank into icy depths.
A heavy silence descended upon the tent. Had that truly just happened? Is this real life?! Please say I am just starring in my own movie! Nobody spoke, nobody moved. Finally, as I sat frozen, mouth agape, one of my friends went to go get the fishermen to see what could be done.
Shockingly, this one was a first for them! How fun!
We returned to the house so I could drown my sorrows in wine and the butternut squash stuffed pasta shells (so yum) that I had made ahead the night before. Another truth of mine: pasta always helps. We also took our vengeance out on the fish that we caught.
PETA can come after me all they want, but the lake took something from me that day (in addition to my dignity). I deserved to take something from the lake.
A few lessons to be learned from this:
DON’T: Bring your phone ice fishing. Just don’t.
DO: Get phone insurance.
DO: Make squash filled pasta to ease the pain.
This recipe was a labor of love to create, but SO worth it! Inspired by the caramelle that I’ve seen (via instagram) Emily Fedner make for the Petit Pasta Joint (if you live in NYC please go so I can live vicariously through you), this fresh pasta is stuffed with a honeynut squash and roasted garlic filling (‘tis the season after all!) and finished in a browned butter, miso, and sage sauce. It is wintery, comforting, and utterly delicious. I started out making tortellini and then got lazy/impatient and switched to making ravioli, but any stuffed pasta shape you like will be wonderful. It’s a lot of work, but I PROMISE you that it’s worth it.
So make a little pasta this holiday season, stay warm out there, and remember to keep those phones in your pockets!
Roasted Squash and Garlic Stuffed Pasta with a Miso, Sage, Butter Sauce
Servings: 4
Total Time: ~2 hr 20 minutes
Active Time: ~1 hr depending on how you roll the pasta
Inactive Time: ~1 hr 20 minutes
Ingredients
For the fresh pasta
2 cups of flour
4 eggs
½ tsp. kosher salt
For the filling
2 small honeynut squash, cut in half lengthwise, seeds removed
1 head of garlic, halved crosswise to expose the cloves
4 tablespoons of olive oil, divided
A splash of apple cider vinegar (great if you already have it, otherwise you do NOT need to buy this)
kosher salt
pepper
a gallon size storage bag (to pipe the filling out of)
For the sauce
6 tablespoons of unsalted butter
15-20 sage leaves
2 tablespoons of miso paste
½ cup of reserved pasta water (or more if necessary)
¼ cup grated parmesan cheese
Directions:
For the filling:
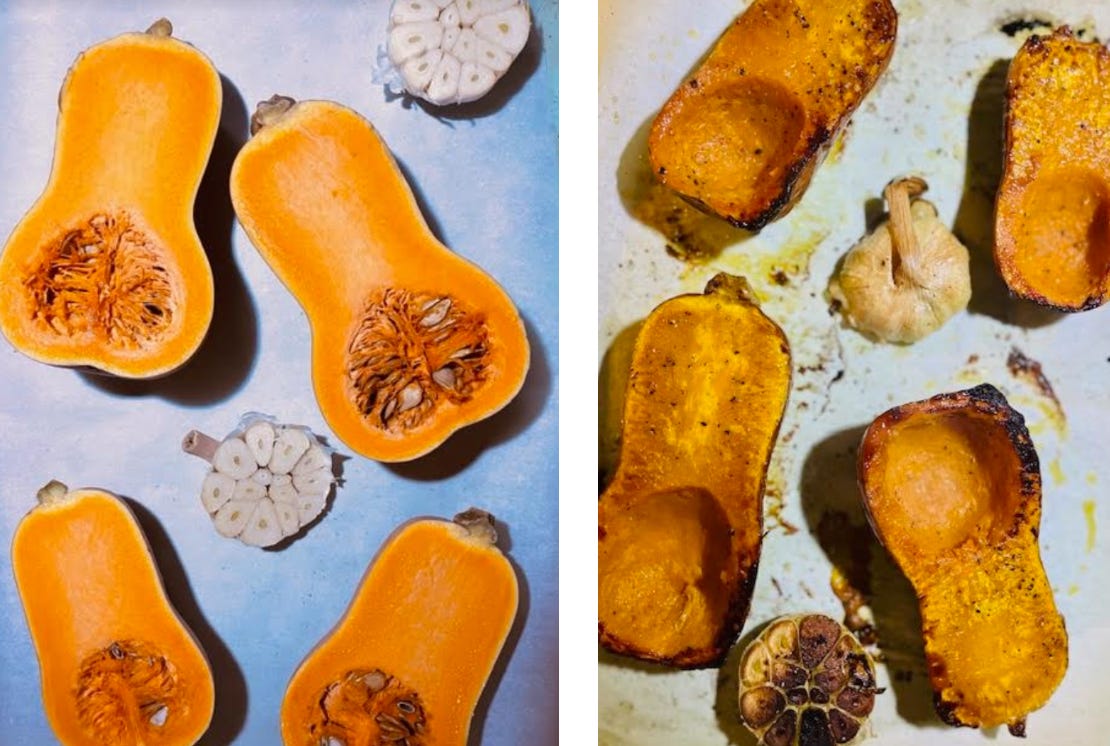
Roast the Squash: Preheat the oven to 400. On a baking sheet lined with parchment paper, place the squash and garlic cut side down. Drizzle with 2 tablespoons of olive oil and sprinkle with a few pinches of salt. Roast for 25-30 minutes until everything is tender and caramelized. Set aside to cool for 15-20 minutes.
Make the Filling: Once the squash and garlic have cooled, scoop the flesh of the squash into a blender and throw out the peel. Squeeze the roasted garlic cloves out of their skins and throw them in with the squash (they should slip out easily with some pressure). Add 2 tablespoons of olive oil, ½ tsp salt, ¼ tsp pepper, and a splash of apple cider vinegar for balance (if you don’t have ACV, no need to buy it! This step is mostly unnecessary and not worth the extra $5). Blend everything until smooth. Taste the mixture and add more salt to your liking. Using a spoon or spatula, transfer the filling into the corner of a gallon size storage bag. Set in the fridge to continue to cool.
For the pasta:
Make the Pasta Dough: On a clean surface (counter, cutting board, silicone mat, etc.), pour the flour into a large mound. Using your fingers, make a well in the center of the flour until it looks like a volcano crater. The goal will be that the flour is high enough on the outside so the eggs won’t escape the crater when you begin to scramble them (see picture). Crack the eggs into the center of the flour crater and gently begin to scramble them with a fork. Incorporate the flour along the edges of the crater little by little into the egg until the mixture is more solid. When more than half the flour is incorporated, add the salt and use your hands to bring the rest of the mixture together into a ball. Begin to knead your pasta dough until it is no longer sticky, 5-7 minutes. Wrap your dough ball in plastic wrap and let it rest in the fridge for at least 30 minutes. First time making homemade pasta? This video is great to get a visual!
Roll the Pasta: I used a pasta machine for my dough, but if you have a rolling pin, you can absolutely do this by hand with a little muscle!
By hand: Cut your ball of dough into 4 pieces. Cover the pieces you’re not using with a towel to keep them from drying out. On a clean surface, using the palm of your hand, flatten the dough as much as you can. Using a rolling pin, start in the center of the dough and roll the top part of the dough out. Do the same with the bottom part. Keep rolling it from the center to the top, then from the center to the bottom, until it is as thin as you can possibly get it. The goal is to make a long, thin rectangle. If your dough gets too sticky, sprinkle on a little more flour. You’ll know it is thin enough if you lift the dough up and can see a faint outline of your hand behind it. Repeat with the other ¾ of the dough.
With a pasta machine: Cut your ball of dough into 4 pieces. Cover the pieces you’re not using with a towel to keep them from drying out. On a clean surface, using the palm of your hand, flatten the dough as much as you can. Sprinkle the dough and your machine with flour to keep it from sticking. Begin to feed your dough through the machine starting at the lowest, widest setting (usually 1), twice. Slowly make the setting smaller, going down 1 number at a time, until you get to the smallest setting (6 or 7). I continuously add a sprinkle of flour and feed it through each setting twice. You’ll know it is thin enough if you lift the dough up and can see a faint outline of your hand behind it. Repeat with the other ¾ of the dough.
Fill the Pasta: Lay your pasta sheets out on parchment or a silicone mat. Take your piping bag with filling and cut a very small hole in the corner.
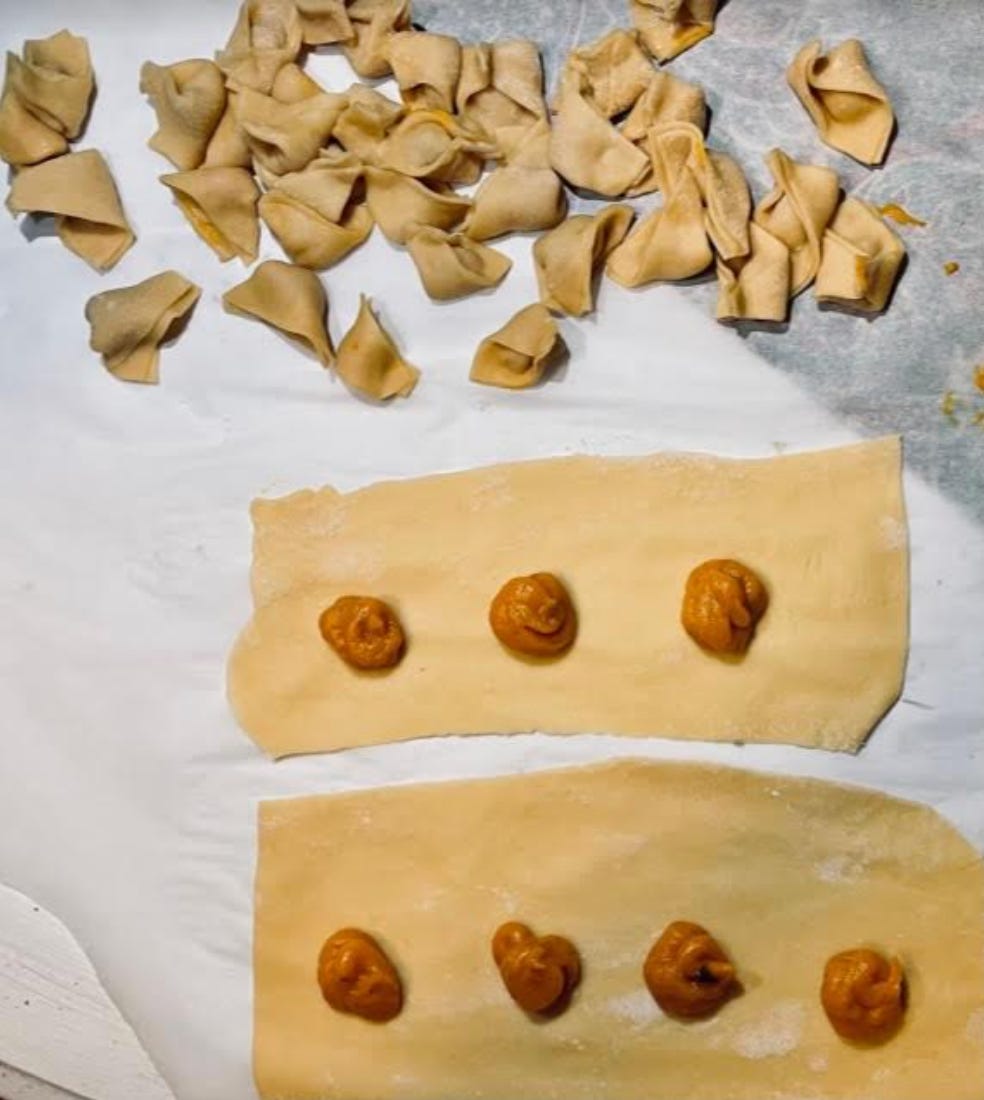
For ravioli: Starting at the left of the sheet, pipe about a teaspoon of filling in the middle of the pasta sheet about an inch from the edge. Move an inch to the right and pipe another teaspoon. Keep moving and piping until you run out of room (see picture above!). Take the top of the pasta sheet and fold it over the filling teaspoons to the bottom of the sheet. Press the edges together well! Lightly press in between each of the squash teaspoons so you know where to cut. Using a knife or pizza cutter, cut in between each pocket of filling to make individual ravioli. Press the edges of each raviolo together super well so that no filling can escape!
For tortellini: Cut your pasta sheets into 2-inch squares (it should look like a dumpling wrapper!). Pipe a little of the filling (about ¼-½ a teaspoon) into the center of each square (be careful not to overfill!). Take one corner of the square and fold it over the filling to the other side. Press the edges down well. You should have a tiny triangle! Take the two edges of the triangle and bring them up to touch each other and press. You should have a little tortellino!
Cook the Pasta: Bring a large pot of HEAVILY salted water to boil. Salty like the sea, as they say! Carefully drop your ravioli/tortellini in and cook until they float to the stop, about 3 minutes.
For the sauce:
Make the Sauce: While your tortellini/ravioli are cooking, make the sauce. To start, put the miso paste in a large serving bowl. In a small saucepan, melt the butter. Add in the sage leaves and cook the mixture for 2 minutes until the butter starts to brown. Remove the sage with tongs and set aside in a bowl for topping. Whisk the browned butter into the serving bowl with the miso until incorporated. Then, whisk in ½ cup of the pasta cooking water until the sauce is smooth and glossy (you may need a little more water depending on how thick you want your sauce).
Assemble: Drain the pasta and pour it directly into the bowl with the sauce. Add the grated parmesan on top and toss to combine. The sauce should stick to the pasta. Crumble the fried sage on top of everything and top with more parmesan. Sit back, eat pasta, drink wine, and enjoy the fruits (er...vegetables?) of your labor!
Notes:
Stuffed pasta is a whole thing and takes time! It will absolutely not look perfect (nor should it imo). Bringing in friends and family to help fill and shape makes it much more fun and a faster process! But, if you’re a control freak (like yours truly) and need to make each one yourself, live your best type A life!
Make Ahead: Feel free to make the filling in advance to save time!
Most grocery stores sell miso paste now, which is FANTASTIC news. It’s truly one of the best ingredients to have in the fridge. Look for it in the refrigerated section (usually where they keep tofu). It’s pricier, but a big tub will last you for so long! Add it to soups, pastas, fried rice, etc. for extra flavor and umami.
Dietary Notes:
Vegetarian recipe.
Dairy Free: Omit the parmesan. Use vegan butter for the sauce.
Vegan: Omit the eggs and substitute ¾ cup of cold water for the pasta dough. Use vegan butter for the sauce.
Gluten Free: 1 to 1 gluten free flour? I’ve never done it, but feel like it would work!
Re-heating Instructions:
Store in the fridge and reheat in the microwave. Re-top with more parm. I would recommend eating within 2-3 days for freshness!
Side Dish Suggestions:
I think a tangy, bitter salad like this one or this one would be lovely!
Wine (pasta’s best friend). I think something lighter like a dry white, orange, or light bodied, dry red would be fabulous.
Substitutions:
Honeynut Squash: Can’t find it? Acorn or butternut are great subs! You may just need to cut them up or cook them longer since they’re a bigger variety!


